By David J. Marks
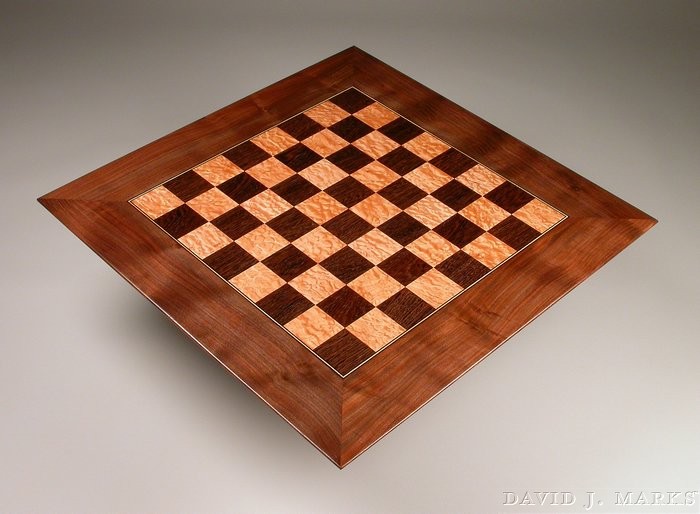
Chessboards have always intrigued me. The game itself is centuries old and has challenged some of the brightest minds on the planet. I have always been fascinated seeing the square patterns joined together in wood but have noticed that some wood workers have made the mistake of gluing up the pieces from solid wood three quarters of an inch thick. They usually frame the chessboard with solid stock and miter the joints only to find that the individual pieces behave like solid wood, expanding and contracting with fluctuations in the humidity levels. This is where the problem occurs. The wood expands usually causing the miter joints to open. You could solve the problem by making a frame and panel and leaving a rabbet expansion joint around the border, but I prefer veneering to ensure stability. A lot of woodworkers are not comfortable working with commercial veneer that is 1/32 of an inch to 1/42 of an inch thick. Band sawn veneer offers the same dimensional stability while having the advantage of working more like solid wood.
The following technique is a hybrid that occurred to me during a challenging commission I had, to build a combination chessboard coffee table in 1986 and I have utilized the same technique for episode 411 of “Woodworks”. To ensure equilibrium in veneer work, the standard rule is to veneer both sides of the substrate. Rather than cutting and gluing lots of little squares together and gluing them to the substrate, I did the following. Begin by resawing laminates an 1/8 inch thick by 2 5/8 inch wide by 24 inches long at the band saw. I chose wenge and quilted maple, a classic black and white contrast. You will need eight strips of wenge and eight strips of maple. Drum sanding to ensure uniform thickness is a nice option if you have one. Next, rip ½ inch thick strips for the substrate from apple plywood, Baltic birch plywood, or MDF (medium density fiberboard) that is also 2 5/8 inches wide by 24 inches long. Then glue the laminates to the plywood making sure to keep the wenge veneers on both sides of four of the plywood strips and the maple veneers on both sides of the other four plywood strips.
Once the glue has dried you should have four strips of plywood veneered both sides with wenge, and four strips veneered both sides in maple. Clean up one side on the jointer and then mill them on the table saw to 2 ½ inches wide all except for one strip of each that we will leave a little wide. Now you can glue these strips alternating black and white colors into one wide board with the wide strip of wenge and maple on the outside border at opposite sides. After scraping the surface flat, trim one edge of the striped board at the table saw to square the corner. Using the freshly sawn edge as a reference cut 2 ½ inch wide strips from the striped board at the table saw. You are just about there. You now have 2 ½ inch squares veneered to both sides of a stable ½ inch plywood substrate laid up in an alternating black and white pattern. By flipping every other strip you will have a checkered pattern. Once you have glued these together you will need to trim the two oversized ends to create a perfect square. Now you will have a beautifully veneered chessboard that you can frame as you like. One last thing, as you lay out your pattern remember to line up “white on the right” if your design has a front and back. Many great chess strategies rely on that layout.
