Posted by David J. Marks August 30, 2014
Unlike most turners who prefer to turn green wood (freshly cut wood that is still wet) I prefer to turn dry wood. One reason is that I have collected a lot of highly figured and unusual wood during my thirty plus years of woodworking, most of which is dry now even if it was green when I purchased it. But more importantly, I like to decorate my bowls, vessels, and wall sculptures with patina finishes and laminated rims, both of which require dry wood.
Of course if you have green wood these techniques will work if you rough turn the piece, let it dry, and then put it back on the lathe to complete the turning.
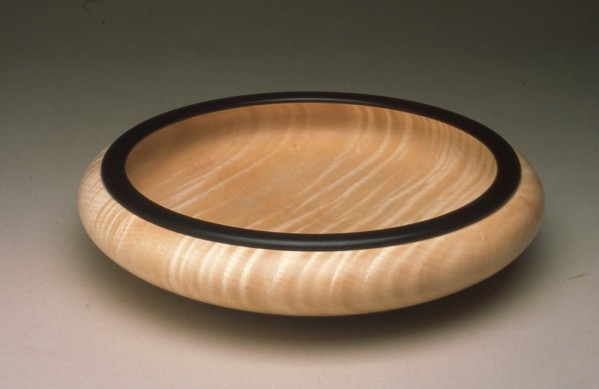
The process I will describe is fairly straightforward. For the bowl blank I selected a highly figured piece of curly sycamore. The sycamore is very light in color and contrasts nicely with the black gaboon ebony that I chose for the rim.
I begin by rough cutting a block of sycamore eleven inches square from a two inch thick board. I like to glue on a waste block so that I can screw a face plate to it. You will need to flatten a three inch or four inch area in the center of the blank to get a secure bond. Typically I will use a two inch thick piece of hardwood for my waste blocks. After the material has been band sawn into a round and mounted on the lathe, you are ready to turn.
Start out with the scraper and flatten an area approximately two inches wide around the outside perimeter. Next resaw some ebony into strips ¼ inch thick by several inches wide and then drum sand them smooth. Plexiglas makes great template stock because you can read the grain through it. I have a dozen different sized Plexiglas templates I have made. Use the template to layout the patterns on the ebony and then cut them out a little oversized on the band saw. The disc sander works well to accurately grind the joint lines. Using cyanoacryllate glue, I’ll glue and clamp one piece at a time. The cyanoacryllate glue sets fast so then I can fit the next piece of ebony to it and continue working all the way around the perimeter.
Once the glue has set, mount the piece back on the lathe and turn the outside with a 3/8 inch bowl gouge. A parting tool works well to clean up and define the rim. The bowl gouge can remove most of the inside of the bowl except where it is undercut at the shoulders. For this, I like to use a 3/16 inch wide bit mounted in a boring bar that is used for hollowing. Then use a round nose scraper tilted at 45 degrees and shear scrape. This is where you need to go slow and steady and gradually fare the curve. You don’t want more than ¼ inch of the scrapers edge in contact with the surface because it is too aggressive. After sanding to 320 grit, turn the waste block down to about a ½ inch dowel, stop the lathe and use a small hand saw to cut it off. I’ll use a rotary burr to remove the nub and finish sanding it with a disc in the drill press. At this point it is ready to apply the finish.
