by David J. Marks
posted August 1, 2019
I last shared with you my progress on the “Ocean” Wall Sculpture commission in the April 2019 newsletter.
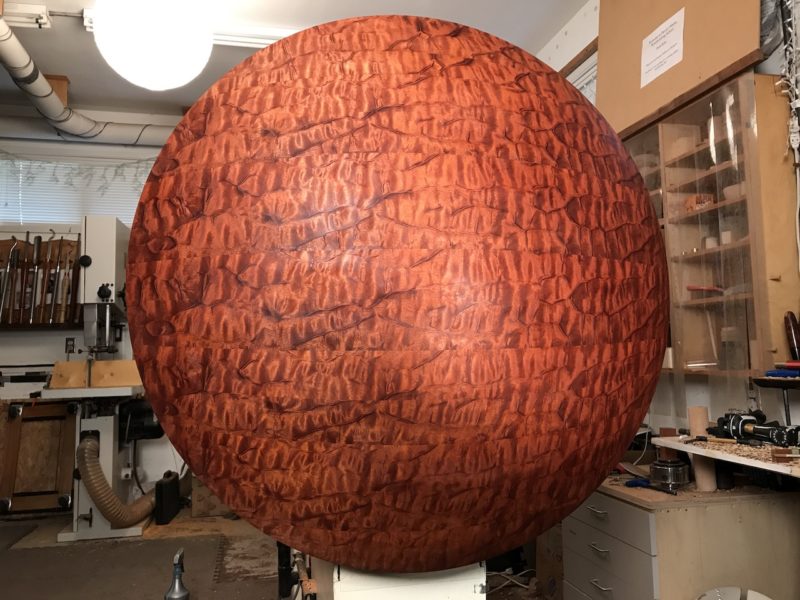
On this commission I made the huge leap to attempting to veneer on a dome, which means all of the veneer is getting glued and pressed onto compound curves!
Working on flat surfaces requires experience and skills to ensure that the veneer is pressed flat and remains stable. The stakes get higher when gluing veneer onto a curved surface. Now platens have to be cut and shaped to match the curves in order to press the veneer down to that curve.
Well, you know the old expression …….”Kicks just keep getting harder to find” and that’s true in my case. At age 67 I’m trying to leave some of the best wood art I can on the planet earth.
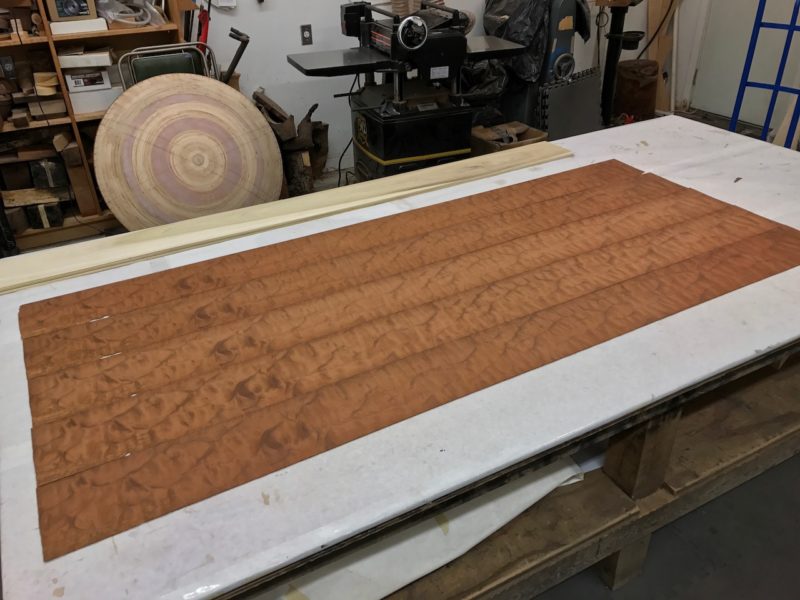
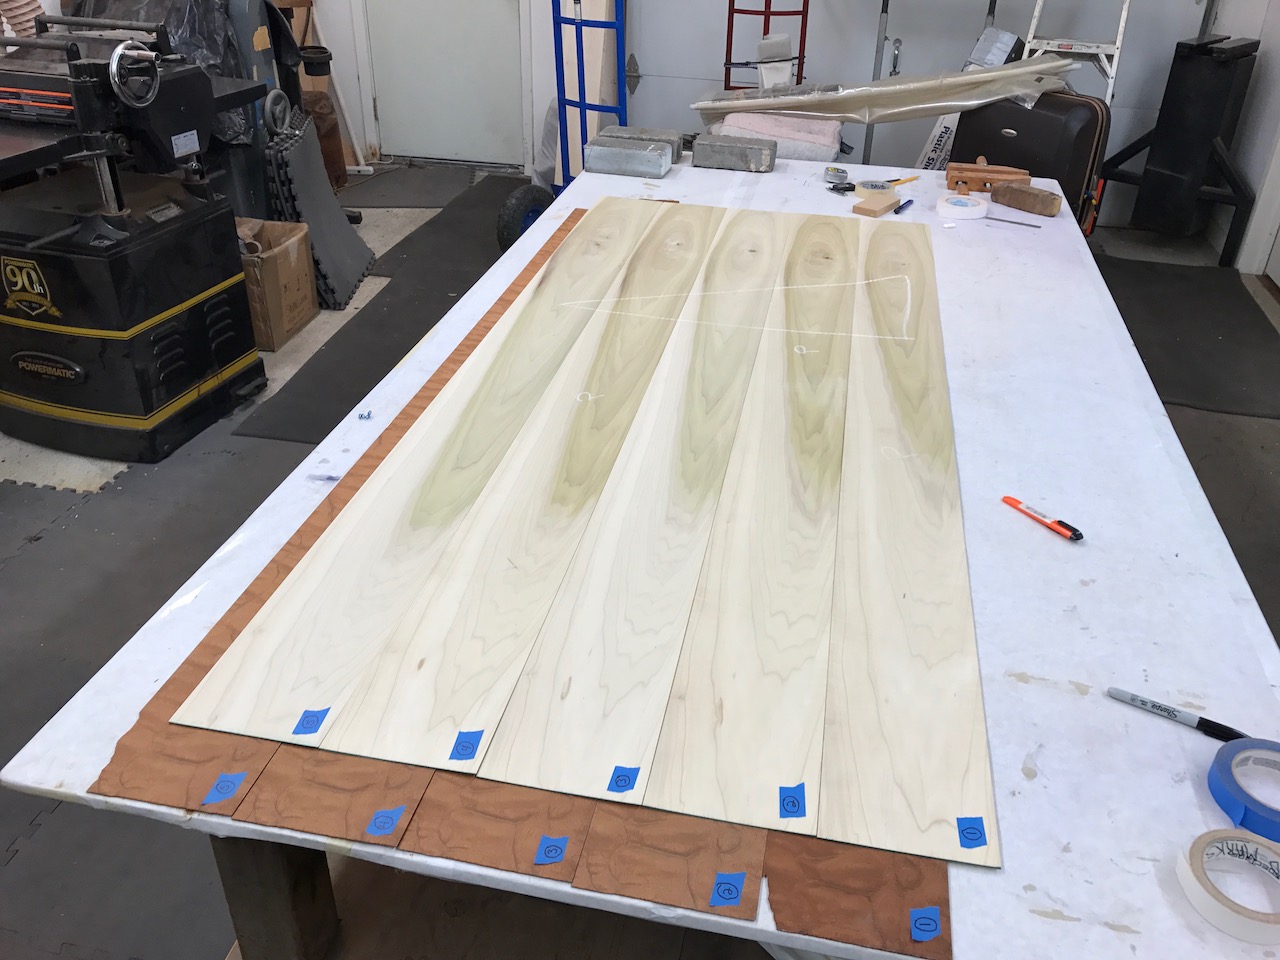
Veneer work requires a level of planning and craftsmanship that is very different from working with solid wood. Everything has to be very carefully planned in advance and there is little room for mistakes. I had just enough precious veneer that I cut from one board of “The Tree” that contained a total of four board feet of lumber, to cover the entire front face as well as the edges, the back bevel and the back flat. I figured that it would be worth the effort to saw up a board of poplar into 1/16″ thick veneer, and use that to cut into numbered pieces to make sure my plan would work. By using the poplar veneer, I could cut it up and place it on the sculpture and map out the entire surface.
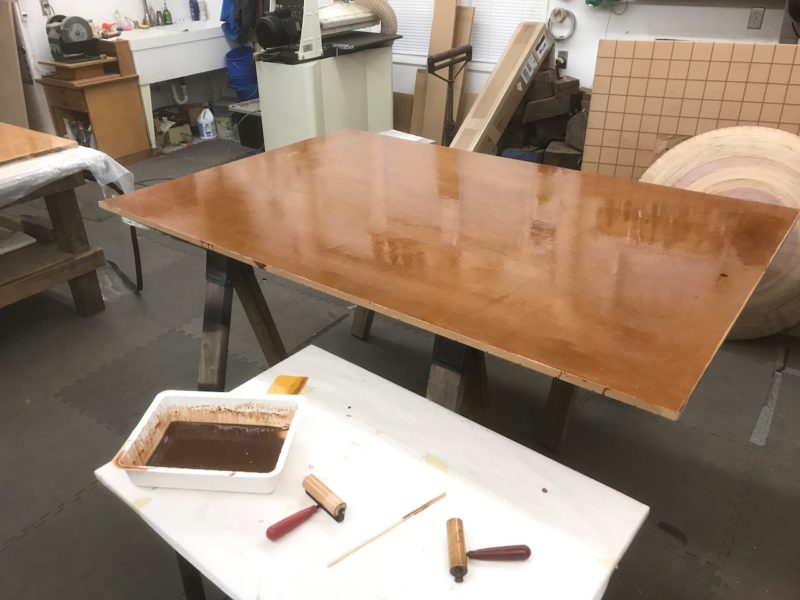
The glue that one chooses to use is also a major decision. I prefer slow setting Urea Resin glue which is gap filling and hardens to a rigid glue line. It’s also highly water resistant and it is an excellent glue for areas with high humidity rates like Houston which will eventually become Ocean’s new home.The brand I like is Unibond 800 and I have had great success with it over decades of use so I know that it will stand up to the test of time.
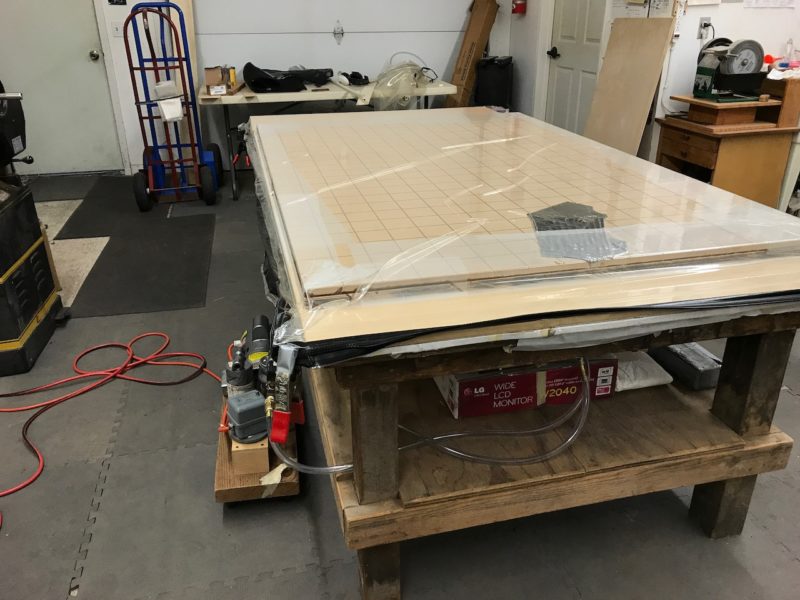
My first challenge in pressing the 1/16″ thick veneer onto a compound curve was to do test runs in my vacuum press. I experienced major problems immediately. This is called “the learning curve”. My first lesson was a reminder of the powerful forces generated by vacuum presses. They generate 1,500 lbs of pressure per square foot. When I placed my plywood dome onto my 3/4″ thick MDF platen, I used a square frame to hold it up off the platen so the veneer would have room to hang over the edges. It wasn’t long after I turned on my pump when a loud Bang jangled my nerves!! Who knew how powerful these things are! My platen imploded completely within the perimeters of my 2 x 4 frame!

My next move was to laminate a new 3/4″ MDF platen/grid onto a sheet of 1″ thick heavy duty void free Baltic birch plywood. When the glue hardened, I had a new rock solid platen/grid that stands up to the force.
I also learned that there is a new type of vacuum bag on the market.
Darryl Keil, a woodworker and the President of Vacuum Pressing Systems Inc., has produced a whole new way of using the vacuum press …. he sells a zipper bag which is made from heavy duty 30 mil polyurethane and it works great!
The zipper bag makes working with large heavy pieces much more manageable, especially for a one man shop.You can check out Darryl’s new zipper bag in the link here:
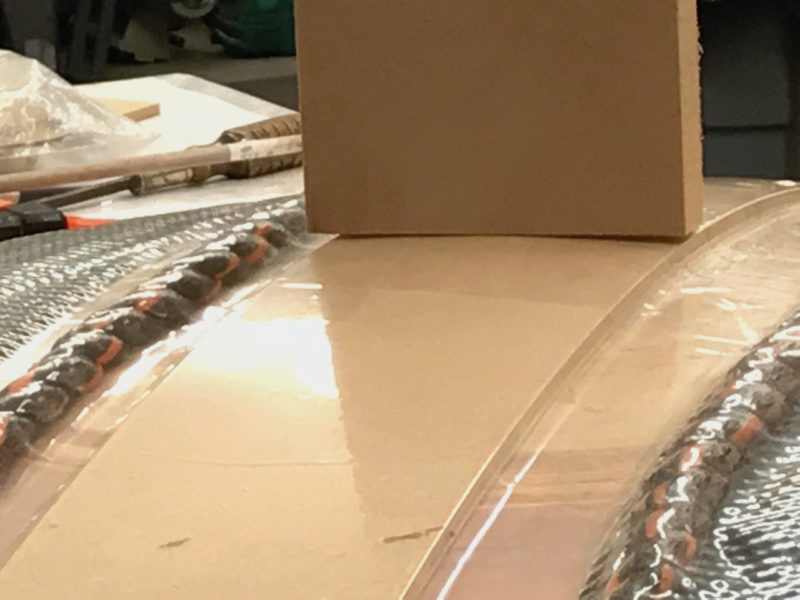
The good news is that by persevering, I eventually experienced success which I tested by placing a straight edge on top of the bag with test pieces under pressure. As you can see in this photo of my test bend the poplar 1/16 inch thick veneer and the 1/8 inch MDF caul have been successfully bent from side to side as well as from front to back, resulting in a compound bend.
Creating Ocean has been an extremely long process which I will share with you in stages in our coming newsletters.